 |
| 2-D Daisy on Blue Construction Paper |

1. Fold a piece of white paper in half lengthwise.

2. Cut one inch wide strips.

3. Four white strips all together.

4. Cut the strips on the fold line making eight strips.

5. Take the strips two by two, and fold them in half lengthwise.

6. Cut the corners off the open ends only.

7. Eight pairs of strips with corners cut off for the daisy petals.

8. Arrange the petals, crease down, on the blue background.

9. Turn over four petals so the crease is facing up.
- Put a line of white glue along the crease.
- At this point it's helpful to move the other petals further out of the way than I did in the picture.

10. Glue the first petals on.
- These first four are guides for the other petals.

11. Turn over the next four petals which are inbetween the petals already glued on.
- Glue on the next four.

12. Now work by quarter sections.
- In the first quarter section, glue on two petals.
- These two fit between the petals already glued on.

13. In the second quarter section, glue in the 11th and 12th petals.

14. In the third quarter section, glue in the 13th and 14th petals.
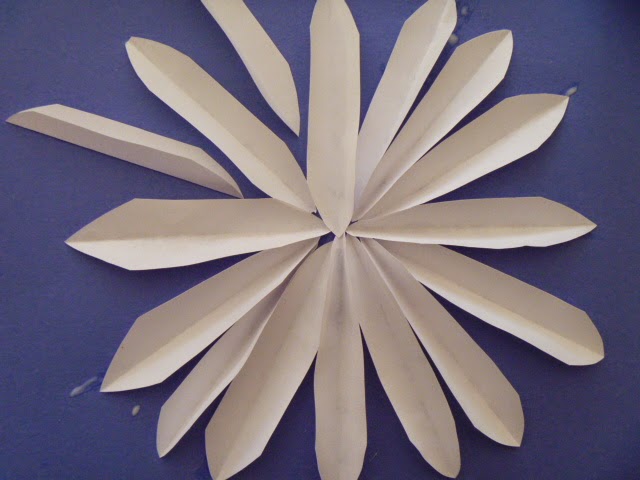
15. In the forth quarter section, glue in the 15th and 16th petals.

16. The last petal going in.

17. Fold a yellow sheet of construction paper in half lenghthwise.
18. Cut two strips an inch wide.

19. Two strips.

20. Cut these strips into one inch squares.

21. Squares for the middle of the daisy.

22. Cruch up the squares and put in the middle of the daisy to see how many are needed.

23. Not all may be needed.

24. Fill the middle of the daisy with white glue.

25. Add cruched up squares applying more glue as needed.

Finished Daisy.
No comments:
Post a Comment
Note: Only a member of this blog may post a comment.