Monday, March 31, 2014

Making a Dozen Paper-Mache Eggs

Start this craft at least three days before Easter!

I like the idea of hiding paper-mache eggs instead of real ones because every-once-in-a-while the Easter Bunny so cleverly hides a few eggs that no one finds them. Finding rotten eggs is never pretty, so I thought I could keep the colored hard boiled eggs in the refrigerator this Easter, and send a message to the Easter Bunny to hide paper-mache eggs instead. So far my family likes this idea.

If we decide to keep the paper-mache eggs until next year, we could use the same eggs again, or coat over the construction paper with new designs with construction paper or paint. That way the production line of the paper-mache undercoats only has to take place once. Or we could add new paper-mache eggs to our collection each year and have endless egg hunts--inside that is. Paper-mache eggs probably wouldn't do well hidden in dewy grass.


Here's the production line I made:
Crunch up twelve pages of newspaper into twelve egg shapes

Mix paste potion using one part white glue and two parts water. A small, clean yogurt container works well for this. Mixing with a plastic folk ensures a smooth potion.
Then dip strips of newspaper in the paste potion and wrap the strips around the egg shaped wads of newspaper.

Production line for a dozen paper-mache Easter eggs
As I reach the end of a coat, I like to sop-up the glue which has dripped onto my plastic lid (parchment paper works well too) with the strips of paper and do clean-up and finish-up all at once.

Production line for a dozen paper-mache eggs--sopping up extra paste

I like using plastic storage box lids or parchment paper as a work-area because I can move these out of the way easily for the eggs to dry overnight, and the eggs don't stick to the plastic or the parchment paper.

Two coats of paste soaked newspaper strips is usually a good base for decoration. Let each coat thoroughly dry overnight.


Ready for Decorating

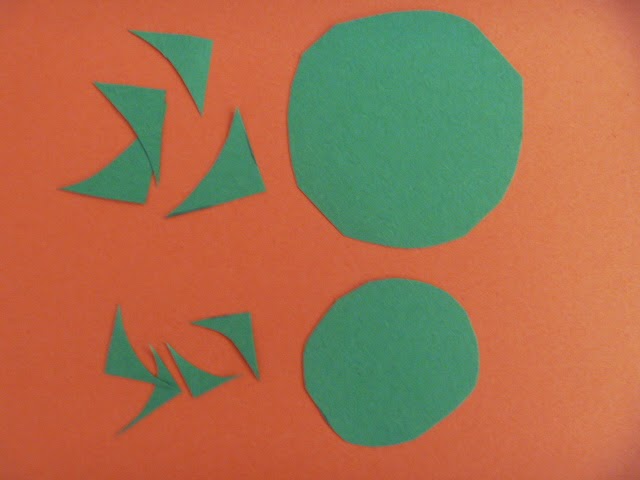
Rip-up strips of construction paper in a variety of colors.

Strips of construction paper to decorate paper-mache eggs

For poka-dots, use a hole punch.

Use a hole punch for dot decorations

I like to lay the strips out and spoon the paste potion over them, so they can soak up the moisture and become more pliable. Since construction paper is thicker than newspaper, it may not stick to the egg well if it isn't soaked thoroughly.

Soaking construction paper strips with paste potion

Decorate

Decorated paper-mache eggs--as you can see, we made our eggs different sizes

Paper-mache eggs decorated with pieces and strips of colored construction paper--we found the strips were easier to work with than the pieces
Actually, the white on the egg with the strips is scrap printer paper which is thinner than construction paper and easier to work with.


Thursday, March 20, 2014

Paper-Mache Easter Egg Decorated with Construction Paper Scraps

Paper-mache egg decorated with construction paper scraps in various colors


A great craft to use up old newspaper and colored paper scraps too small for other projects.

Materials
  • White glue
  • Water
  • Small yogurt container
  • Parchment paper or large plastic storage box lid
  • Plastic spoon
  • Newspaper
  • Construction paper scraps in various colors
Directions
Take a page of newspaper and wad it up about the shape and size of the egg you'd like.

Mix about one part white glue with two parts water in a small, clean yogurt container. On the parchment paper or plastic box top, dip strips of newspaper in the glue/water mixture and cover the wad of newspaper completely with the strips. As you wrap the strips around the wad of paper, gently squeeze and form the wad into a more smooth egg shape. Let dry for a day and then apply a second layer of glue/water soaked strips. Let dry for a second day.


When the newspaper layers are dry, tear up pieces of construction paper in different colors. Lay the torn up paper out on the parchment paper or plastic box lid and cover with the glue/water mixture. Since the construction paper is thicker than newspaper, soaking the construction paper makes it easier to work with.  Also spreading the colored paper out, makes it easy to select the color and shape you want to put on your egg next. Apply different colored paper in any design you'd like to the egg.


Wednesday, March 19, 2014

Octopus Craft: Bright, Crazy Eyed Octopi made from TP Rolls and Old Clothes

Crazy Eyed Octopi
Materials


  • Empty toilet paper roll or paper towel roll
  • Two different colored construction paper for the eyes--your choice of colors
  • Neon, non toxic, washable paint--your choice of color
  • Paintbrush
  • Scissors--kid safe
  • Fabric that goes with (completely your call) eyes and and paint color, about five inches by ten inches--from old clothes, blankets, towels, whatever you don't need anymore. This will be the legs.
  • Hole punch
  • Glue
  • Tape measure or ruler
  • Yarn (optional)  
    Supplies for octopi


Octopus body

  1. Cut off the top two inches of a toilet paper or paper towel roll for the octopus body.
    Cut off top two inches of roll
  2. Paint the body with your favorite bright (neon) colored paint.
    Paint
While the paint dries
  1. Trace around the lid of the paint on the colored paper for the eyes.
    Trace around the paint lid for a circle for the eyes
  2. Use the same lid to trace around for both colors of the eyes. Where you cut will determine the size.
    Trace same lid for both colors
  3. Cut on the traced circle line for the large part of the eyes. Cut just inside the traced circle for the  small part of the eyes.
    Cut on line for big part of eye, cut just inside the line for small part of the eye
  4. Before gluing the eyeballs in the larger circle, play with their placement. Placing the eyeballs on the outer edge of the larger eye, gives a going all ways sort of look.
    Going all ways eyes
  5. Placing the eyeballs looking toward each other makes cross-eyes.
    Cross-eyes
  6. Placing the eyeballs at the top of the larger eyes, gives a going up sort of look.
    Going Up eyes
  7. Placing the eyeballs randomly within the bigger eyes, gives a mixed-up sort of look.
    Mixed Up eyes
  8. Glue the eyeballs in the bigger eyes where you think they look best.
For Knot top legs do the following steps
For Two legs with one strip of fabric, skip these steps and see below
Knot top legs
  1. Cut eight strips from your chosen fabric about one half inch wide and five inches long.
    Five inch long strips for knot top legs
  2. Knot the top of each of these strips.
    Knot strips at top
  3. When the roll is dry, punch eight holes around the bottom of the octopus.
    Punch holes for legs--start with the front, then the back directly behind the front hole, then the sides across from each other, then the last four holes in between the others.
  4. Poke the end of the fabric that isn't knotted through the holes from the inside to the outside.
    Gently thread strips through holes
  5. Pull each strip through carefully. If pulled to hard, the knot could be pulled through, and the legs will fall off.
Two legs with one strip of fabric
Octopi with two legs made from one strip of fabric--they have inner and outter legs

  1. Cut four strips from your chosen fabric about one half inch wide and ten inches long.
    Four strips, each ten inches long
  2. When the roll is dry, punch eight holes around the bottom of the octopus.
    Punch holes for legs using one strip of fabric for two legs--start with the front hole, then the back hole, then the sides, then the four holes inbetween the rest
  3. Fold the first strip in half and thread the end through two holes next to each other going from the outside in. These are two of the inner legs.
    Thread ends from outside in
  4. Fold the next strip in half and thread the ends through the next two holes this time going from the inside out. These are two of the outer legs.
    Thread ends from inside out
  5. Repeat steps 3 and 4 for the last two strips--the last four legs.

Finishing your octopus
  1. Glue on eyes.
  2. Punch two holes across from each other in the top of the head.
    Holes for handle
  3. Thread either yarn or a strip of fabric about twelve inches long through the two holes (across the top of the head).
  4. Tie at top. This is the handle or hanger with which to carry or display your octopus.
    For Handle/Hanger--thread yarn through holes and tie

Saturday, March 15, 2014

Making a Leprechaun from a Toilet Paper Roll


Here's a little leprechaun for Saint Patrick's Day made from a toilet paper roll and construction paper, put together with glue and tape.

Materials

  • One empty toilet paper roll
  • Four different colors of construction paper: green, black, beige, orange, and yellow
  • Elmer's or Tacky glue (Tacky glue like it's name is a little thicker and sticker which may not drip as easily and may stick pieces together quicker.)
  • Scotch tape
  • Kid safe scissors (and perhaps a bigger scissors for an adult to cut the TP roll)
  • Black marker
  • Pencil
    Supplies for Leprechaun


Start by putting the hat together since the glue takes some time to set to hold the parts together. 
The Hat


  1. Cut the top one third part of a TP roll off for the hat--an adult may have to use a big scissors to do this.
    Cut of top one third of TP roll for the leprechaun's hat
  2. Put this top third of the TP roll on top of a piece of green construction paper and make a square about one half inch bigger than the opening of the TP roll.
    Draw a square about one half inch bigger than TP roll diameter for brim
  3. Cut out the square.
  4. Snip off the corners until the square forms a circle. This is the brim of the hat. (Save corner snippings for hands and feet.)
    Snip off corners of large square to form a circle for the brim of the leprechauns' hat
  5. Put the top third of the TP roll on top of another piece of green construction paper, but this time draw a square around it that is barley an eighth of an inch bigger than the circle opening in the TP roll.
    A smaller square for the top of the hat
  6. Cut out this smaller square and snip off the corners to form a small circle. This is the top of the hat. (Save corner snippings for hands and feet.)
    Large circle for the brim, small circle for top of hat--save all corner snippings
  7. Cut a strip of green paper about two and a quarter inches wide and five and a half inches long. It should go completely around the top third of the TP roll. Feel free to adjust these rough measurements as you need.
    Cutting the green strip of paper to wrap around the hat
  8. Wrap this green paper strip around the TP roll. Fasten the paper to the back of the TP roll and together with tape.
    Tape one end of the green strip onto the back of the TP roll and fasten the other end, slightly overlapping the first, with tape
  9. Put glue along the bottom of the TP roll.
    Put glue around bottom edge of TP roll for hat. I used Elmer's glue because it's easy to squeeze out in a line, but Tacky glue, which is a little more difficult to squeeze out because of its thickness, would be nice here because its thickness would keep it on the edge better.
  10. Place the glued edge on top and in the center of the large green circle, the brim of the hat.
    Place bottom edge with the glue on the large circle for the brim
  11. Put glue around the top of the TP roll. 
    Put glue on top edge of TP roll for hat
  12. Place the small green circle, the top of the hat, on top of the TP roll.
    Place small circle on top
Set the hat aside to dry. The buckle decoration will be added after it is dry.
Buckle Decoration for Hat
  1. Cut a thin black piece of construction paper about one forth inch wide and five and a half inches long.
    Black hatband
  2. Cut a rectangle from yellow construction paper about one half in wide and almost an inch long.
  3. Cut a little rectangle out of the middle of the yellow rectangle--an adult may have to do this.
    Cutting the middle out of the buckle
  4. Glue yellow rectangle on to the middle of the long thin strip of black.
    Glue buckle onto hatband
When the glue of the yellow buckle and the glue on the hat is dry, tape one end of the long thin strip on the back of the hat near the brim, and wrap the strip around the hat taping the ends together at the back of the hat. (The same way you attached the green strip to the TP roll and wrapped the green paper around the roll.)
Face and Body 
  1. Cut a beige strip of paper about one and a half inch wide and five and a half inches long.
  2. Cut a green strip of paper the same size as the beige one.
  3. In the middle of the biege strip, draw the leprechaun's face with a black marker.
  4. On the green strip, draw the leprechaun's suit with a few buttons.
    Draw face and suitcoat--it might help to lightly tape down the pieces
  5. On a small orange rectangle, draw a beard that fit under the mouth and set aside.
    Draw shape of beard and save for later
  6. Fasten the face and suit strips on the larger remaining portion of the TP roll the same way the buckle decoration for the hat was fastened on with tape making sure the suit lines up under the face.
    Attach face first and then line up suit under face and tape on in back
  7. Cut out the beard, and glue it on under the leprechaun's mouth.
    Glue on beard
Arms and Hands
  1. Cut two thin strips of black paper about one forth inch wide and two inches long for the arms.
    Strips of black paper for legs and arms
  2. Fold these strips up like an accordian or a fan.
    Legs and arms folded fan style
  3. Tape these arms to each side of Mr. Leprechaun's body.
  4. Choose two of the green corner clippings from the hat for hands and trim to the shape desired.
  5. Glue these corner clipping on to the ends of the accordian stips.
    Glue on small corner clippings for hands and large corner clippings for feet
Legs and Feet
The same as the arms and hands EXCEPT:
  1. The black strips of paper should be five inches long instead of two inches long.
  2. The corner clippings should be a little larger than the ones for the hands.
  3. Tape the legs on to the inside bottom front of the face/body TP roll.
Attach the Hat to the Head
  1. Sit Mr. Leprechaun up so he won't fall over.
  2. Put a line of glue around the top edge of his head.
    Line of glue around top of leprechaun's head
  3. Place the hat--brim side down--on the line of glue.
    Place hat on head
Let dry and find a pot of gold for Mr. Leprechaun to sit next to. Happy Saint Patrick's Day!