Showing posts with label Saint Patrick's Day. Show all posts

Tuesday, March 17, 2015

Paper Craft for a Saint Patrick's Day Game: Pot of Gold Game Board


Yesterday I made the cube you use to roll for this board game:

Paper Craft for a Saint Patrick's Day Game: Pot of Gold Cube

Today here is the game board.

We'll start on the square of the Book of Kells because books are often the beginning of wondrous journeys.

We'll end on the pot of gold since it is the treasure at the end of the rainbow.

So draw the book in the first square, and make a curvy path of empty squares all the way to the end. In the very last square, draw a pot of gold. (Directions for drawing the pictures are in yesterday's post.)

Begin with the Book of Kells and End with the Pot of Gold

Next draw in the rainbows. These will allow you to skip ahead in the game by sliding over the rainbow.

Rainbows Added

 Now draw a leprechaun in the square after the Book of Kells.

Leprechaun in the Second Square

In the next square, draw a four-leaf-clover.

Four-Leaf-Clover

In the square after the four-leaf-clover, draw a shamrock.

As you can see, I already have a rainbow after the four-leaf-clover, so I'll go on to the next space and draw the shamrock there.
It's okay if your is different.

Shamrock

After the shamrock is the leprechaun again. Continue filling in the squares with pictures from the cube in this order:

  1. Leprechaun
  2. Four-Leaf-Clover
  3. Shamrock
Skip the squares with the rainbows as you go.

Squares Finished on Game Board

Other Features on the Board

  • Highlight the last three squares with a yellow pen. These are the only squares a player can win the game by rolling a pot of gold. Otherwise when a player rolls a pot of gold, he/she gets another roll.

Last Three Squares Highlighted


  • Draw a Book of Kells on the board anywhere there is a clear spot.

Book of Kells Drawn on the Board


  • This picture is for a small stack of cards cut out of green construction paper.


Small Stack of Cards


  • On each of these cards, write a number: 1, 2, or 3.


One Number on Each Card


  • So if a player rolls the Book of Kells, she/he picks a card and moves ahead the number of squares on the card, then puts the card at the bottom of the pile.

Gold Coins


  • Cut out about ten circles from yellow paper for gold coins players collect to get to the pot of gold.


Completed Game Board all Set Up to Play


Pot 'O Gold Game Instructions

  • Each player chooses a place marker--you can use a nickel, dime, penny, and a quarter
  • Start on the Book of Kells
  • First Player to get three gold coins or more, and roll the pot of gold after reaching the highlighted squares wins.
  • Youngest player goes first or whoever rolls the Book of Kells first
  • Roll the cube by hitting it up into the air at least three times before letting it fall to the ground. The picture facing up is your roll.

Playing the Game

  • Move forward to the closest spot of your roll--if you roll a shamrock, then you move to the nearest shamrock square ahead of your piece.
  • Rainbows--If you roll a rainbow, move ahead to the nearest one, then slide over the rainbow to a square even further ahead.
  • Book of Kells--If you roll the Book of Kells, draw a card and move forward the number of spaces indicated. If that lands you on a rainbow, slide on up. 
  • Leprechauns--If you roll a leprechaun, you move backward to the nearest leprechaun instead of forward.
  • Leprechauns in the last three highlighted squares--If  you are in the highlighted squares and roll a leprechaun, move to the one in the highlighted area even if you move forward. Then stay there until you roll the pot of gold.
  • Pot of Gold--If you roll a pot of gold before your reach the highlighted squares at the end, take a gold coin, but do not move ahead. You must collect at least three gold coins before entering the highlighted area. You may not move to the end pot of gold until you have entered the highlighted squares.
  • Winning the Game--After you have collected at least 3 gold coins, you may enter the area of highlighted squares. Then you must roll the pot of gold to move to the end and win the game.

Monday, March 16, 2015

Paper Craft for a Saint Patrick's Day Game: Pot of Gold Cube


After you have finished making the cube here, you can use it with this playing board.


Materials

  • one green sheet of construction paper
  • ruler
  • non-toxic markers
  • kid safe scissors
  • tape

Pot of Gold Cube Materials


Part I: Drawing the Cube

Draw two parallel lines eight inches long down the middle of the green sheet of paper.

Two Parallel Lines

Every two inches, attach the two parallel lines with a line from one to the other.

Parallel Lines Attached every Two Inches

The second square down, extend lines on each side two inches.

Second Square's Lines Extended

Close each end of the new lines.

Ends Closed

Make tabs at every end.

Tabs Added

Part II: Pictures on the Sides of the Cube

The first picture is on the top cube--a rainbow. Draw the rainbow with markers.
When I was refreshing my memory of the colors of the rainbow, I found
which not only gave me the order of the colors, but a kid friendly explanation of rainbows.

Rainbow

In the second square down, draw a leprechaun. Start with the face.

Face

Then a hat.

Hat

Last hair and beard.

Hair and Beard

To the left of the leprechaun, draw a four-leaf-clover with four hearts.
Four-Leaf-Clover

To the right of the leprechaun, draw a pot of gold.

The Rim

The Pot

The Feet

The Gold

Underneath the leprechaun, draw a shamrock with three hearts.

Shamrock

Underneath the shamrock, draw the Book of Kells, the famous beautifully illustrated book on display at Trinity Collage in Dublin.

Top and Middle of the Book

Sides and Pages at the Sides

Bottom and Pages at the Bottom

A Little Decoration

Cut along the outer lines.

Cut Out

Fold along each line.

Folded

Cut off tab above rainbow.

Cut off Tab

Put tape on other three tabs.

Put on Tape

Attach the pot of gold tab underneath the Book of Kells square.

Pot of Gold and Book of Kells Squares Connected

Attach the four-leaf-clover tab underneath the Book of Kells square.

Four-Leaf-Clover and Book of Kells Squares Connected

Attach the Book of Kells Tab to the rainbow square.

Book of Kells and Rainbow Squares Connected


Part III: Play A Little Game

Call out one of the pictures on the cube.
Now throw the cube in the air and hit it back up three times. After the third hit, let it fall to the ground.
Which ever picture is facing up is your roll. If it matches the one you called, you win that roll.

Part IV: An Irish Movie

We enjoy The Secret of Kells embedded here thanks to Hulu.com. The Book of Kells is the inspiration for the movie.

Saturday, March 15, 2014

Making a Leprechaun from a Toilet Paper Roll


Here's a little leprechaun for Saint Patrick's Day made from a toilet paper roll and construction paper, put together with glue and tape.

Materials

  • One empty toilet paper roll
  • Four different colors of construction paper: green, black, beige, orange, and yellow
  • Elmer's or Tacky glue (Tacky glue like it's name is a little thicker and sticker which may not drip as easily and may stick pieces together quicker.)
  • Scotch tape
  • Kid safe scissors (and perhaps a bigger scissors for an adult to cut the TP roll)
  • Black marker
  • Pencil
    Supplies for Leprechaun


Start by putting the hat together since the glue takes some time to set to hold the parts together. 
The Hat


  1. Cut the top one third part of a TP roll off for the hat--an adult may have to use a big scissors to do this.
    Cut of top one third of TP roll for the leprechaun's hat
  2. Put this top third of the TP roll on top of a piece of green construction paper and make a square about one half inch bigger than the opening of the TP roll.
    Draw a square about one half inch bigger than TP roll diameter for brim
  3. Cut out the square.
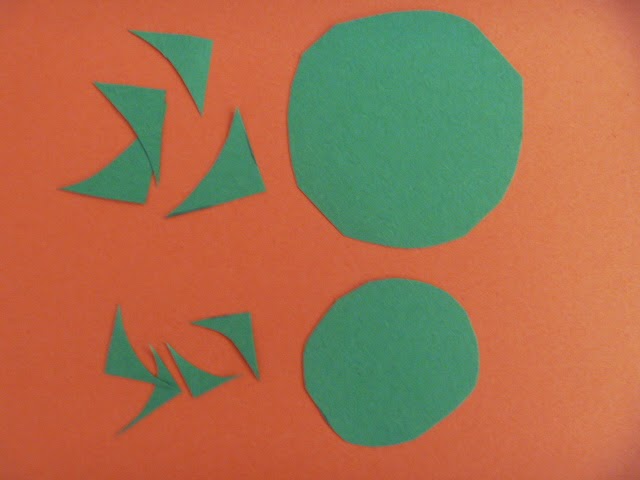
  4. Snip off the corners until the square forms a circle. This is the brim of the hat. (Save corner snippings for hands and feet.)
    Snip off corners of large square to form a circle for the brim of the leprechauns' hat
  5. Put the top third of the TP roll on top of another piece of green construction paper, but this time draw a square around it that is barley an eighth of an inch bigger than the circle opening in the TP roll.
    A smaller square for the top of the hat
  6. Cut out this smaller square and snip off the corners to form a small circle. This is the top of the hat. (Save corner snippings for hands and feet.)
    Large circle for the brim, small circle for top of hat--save all corner snippings
  7. Cut a strip of green paper about two and a quarter inches wide and five and a half inches long. It should go completely around the top third of the TP roll. Feel free to adjust these rough measurements as you need.
    Cutting the green strip of paper to wrap around the hat
  8. Wrap this green paper strip around the TP roll. Fasten the paper to the back of the TP roll and together with tape.
    Tape one end of the green strip onto the back of the TP roll and fasten the other end, slightly overlapping the first, with tape
  9. Put glue along the bottom of the TP roll.
    Put glue around bottom edge of TP roll for hat. I used Elmer's glue because it's easy to squeeze out in a line, but Tacky glue, which is a little more difficult to squeeze out because of its thickness, would be nice here because its thickness would keep it on the edge better.
  10. Place the glued edge on top and in the center of the large green circle, the brim of the hat.
    Place bottom edge with the glue on the large circle for the brim
  11. Put glue around the top of the TP roll. 
    Put glue on top edge of TP roll for hat
  12. Place the small green circle, the top of the hat, on top of the TP roll.
    Place small circle on top
Set the hat aside to dry. The buckle decoration will be added after it is dry.
Buckle Decoration for Hat
  1. Cut a thin black piece of construction paper about one forth inch wide and five and a half inches long.
    Black hatband
  2. Cut a rectangle from yellow construction paper about one half in wide and almost an inch long.
  3. Cut a little rectangle out of the middle of the yellow rectangle--an adult may have to do this.
    Cutting the middle out of the buckle
  4. Glue yellow rectangle on to the middle of the long thin strip of black.
    Glue buckle onto hatband
When the glue of the yellow buckle and the glue on the hat is dry, tape one end of the long thin strip on the back of the hat near the brim, and wrap the strip around the hat taping the ends together at the back of the hat. (The same way you attached the green strip to the TP roll and wrapped the green paper around the roll.)
Face and Body 
  1. Cut a beige strip of paper about one and a half inch wide and five and a half inches long.
  2. Cut a green strip of paper the same size as the beige one.
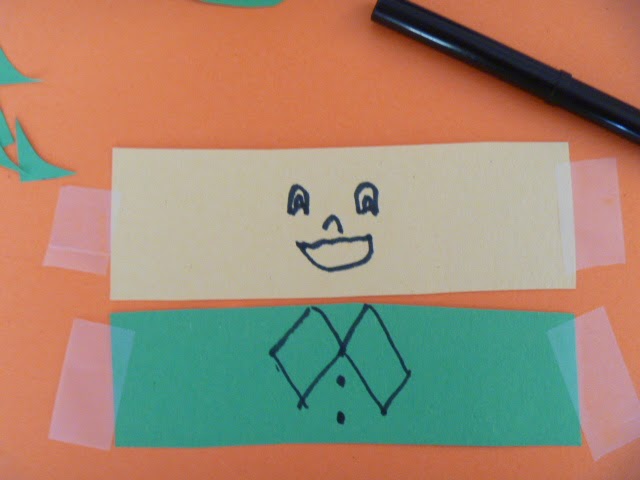
  3. In the middle of the biege strip, draw the leprechaun's face with a black marker.
  4. On the green strip, draw the leprechaun's suit with a few buttons.
    Draw face and suitcoat--it might help to lightly tape down the pieces
  5. On a small orange rectangle, draw a beard that fit under the mouth and set aside.
    Draw shape of beard and save for later
  6. Fasten the face and suit strips on the larger remaining portion of the TP roll the same way the buckle decoration for the hat was fastened on with tape making sure the suit lines up under the face.
    Attach face first and then line up suit under face and tape on in back
  7. Cut out the beard, and glue it on under the leprechaun's mouth.
    Glue on beard
Arms and Hands
  1. Cut two thin strips of black paper about one forth inch wide and two inches long for the arms.
    Strips of black paper for legs and arms
  2. Fold these strips up like an accordian or a fan.
    Legs and arms folded fan style
  3. Tape these arms to each side of Mr. Leprechaun's body.
  4. Choose two of the green corner clippings from the hat for hands and trim to the shape desired.
  5. Glue these corner clipping on to the ends of the accordian stips.
    Glue on small corner clippings for hands and large corner clippings for feet
Legs and Feet
The same as the arms and hands EXCEPT:
  1. The black strips of paper should be five inches long instead of two inches long.
  2. The corner clippings should be a little larger than the ones for the hands.
  3. Tape the legs on to the inside bottom front of the face/body TP roll.
Attach the Hat to the Head
  1. Sit Mr. Leprechaun up so he won't fall over.
  2. Put a line of glue around the top edge of his head.
    Line of glue around top of leprechaun's head
  3. Place the hat--brim side down--on the line of glue.
    Place hat on head
Let dry and find a pot of gold for Mr. Leprechaun to sit next to. Happy Saint Patrick's Day!