
Here's a little leprechaun for Saint Patrick's Day made from a toilet paper roll and construction paper, put together with glue and tape.
Materials
- One empty toilet paper roll
- Four different colors of construction paper: green, black, beige, orange, and yellow
- Elmer's or Tacky glue (Tacky glue like it's name is a little thicker and sticker which may not drip as easily and may stick pieces together quicker.)
- Scotch tape
- Kid safe scissors (and perhaps a bigger scissors for an adult to cut the TP roll)
- Black marker
- Pencil

Supplies for Leprechaun
Start by putting the hat together since the glue takes some time to set to hold the parts together.
The Hat
- Cut the top one third part of a TP roll off for the hat--an adult may have to use a big scissors to do this.

Cut of top one third of TP roll for the leprechaun's hat - Put this top third of the TP roll on top of a piece of green construction paper and make a square about one half inch bigger than the opening of the TP roll.

Draw a square about one half inch bigger than TP roll diameter for brim - Cut out the square.
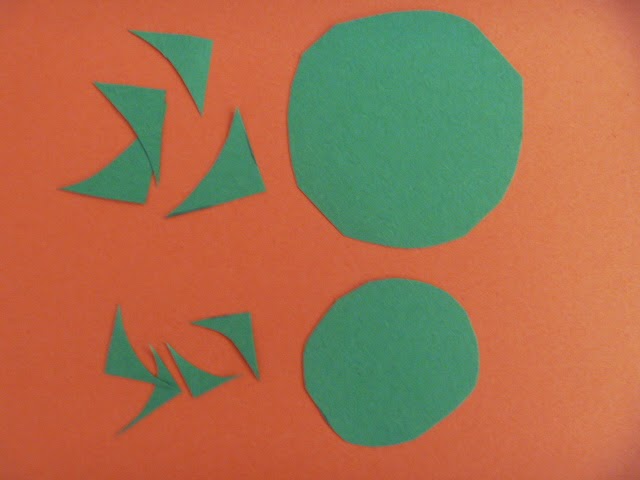
- Snip off the corners until the square forms a circle. This is the brim of the hat. (Save corner snippings for hands and feet.)

Snip off corners of large square to form a circle for the brim of the leprechauns' hat - Put the top third of the TP roll on top of another piece of green construction paper, but this time draw a square around it that is barley an eighth of an inch bigger than the circle opening in the TP roll.

A smaller square for the top of the hat - Cut out this smaller square and snip off the corners to form a small circle. This is the top of the hat. (Save corner snippings for hands and feet.)
Large circle for the brim, small circle for top of hat--save all corner snippings - Cut a strip of green paper about two and a quarter inches wide and five and a half inches long. It should go completely around the top third of the TP roll. Feel free to adjust these rough measurements as you need.

Cutting the green strip of paper to wrap around the hat - Wrap this green paper strip around the TP roll. Fasten the paper to the back of the TP roll and together with tape.

Tape one end of the green strip onto the back of the TP roll and fasten the other end, slightly overlapping the first, with tape - Put glue along the bottom of the TP roll.

Put glue around bottom edge of TP roll for hat. I used Elmer's glue because it's easy to squeeze out in a line, but Tacky glue, which is a little more difficult to squeeze out because of its thickness, would be nice here because its thickness would keep it on the edge better. - Place the glued edge on top and in the center of the large green circle, the brim of the hat.

Place bottom edge with the glue on the large circle for the brim - Put glue around the top of the TP roll.

Put glue on top edge of TP roll for hat - Place the small green circle, the top of the hat, on top of the TP roll.

Place small circle on top
Set the hat aside to dry. The buckle decoration will be added after it is dry.
Buckle Decoration for Hat
- Cut a thin black piece of construction paper about one forth inch wide and five and a half inches long.

Black hatband - Cut a rectangle from yellow construction paper about one half in wide and almost an inch long.
- Cut a little rectangle out of the middle of the yellow rectangle--an adult may have to do this.

Cutting the middle out of the buckle - Glue yellow rectangle on to the middle of the long thin strip of black.

Glue buckle onto hatband
Face and Body
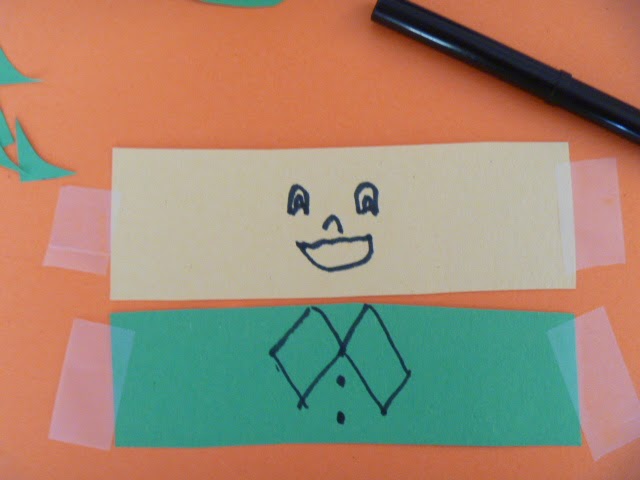
- Cut a beige strip of paper about one and a half inch wide and five and a half inches long.
- Cut a green strip of paper the same size as the beige one.
- In the middle of the biege strip, draw the leprechaun's face with a black marker.
- On the green strip, draw the leprechaun's suit with a few buttons.
Draw face and suitcoat--it might help to lightly tape down the pieces - On a small orange rectangle, draw a beard that fit under the mouth and set aside.

Draw shape of beard and save for later - Fasten the face and suit strips on the larger remaining portion of the TP roll the same way the buckle decoration for the hat was fastened on with tape making sure the suit lines up under the face.

Attach face first and then line up suit under face and tape on in back - Cut out the beard, and glue it on under the leprechaun's mouth.

Glue on beard
Arms and Hands
- Cut two thin strips of black paper about one forth inch wide and two inches long for the arms.

Strips of black paper for legs and arms - Fold these strips up like an accordian or a fan.

Legs and arms folded fan style - Tape these arms to each side of Mr. Leprechaun's body.
- Choose two of the green corner clippings from the hat for hands and trim to the shape desired.
- Glue these corner clipping on to the ends of the accordian stips.

Glue on small corner clippings for hands and large corner clippings for feet
Legs and Feet
The same as the arms and hands EXCEPT:
- The black strips of paper should be five inches long instead of two inches long.
- The corner clippings should be a little larger than the ones for the hands.
- Tape the legs on to the inside bottom front of the face/body TP roll.
Attach the Hat to the Head
- Sit Mr. Leprechaun up so he won't fall over.
- Put a line of glue around the top edge of his head.

Line of glue around top of leprechaun's head - Place the hat--brim side down--on the line of glue.

Place hat on head
Let dry and find a pot of gold for Mr. Leprechaun to sit next to. Happy Saint Patrick's Day!
No comments:
Post a Comment
Note: Only a member of this blog may post a comment.