Showing posts with label watercolor. Show all posts

Tuesday, April 14, 2015

Crayon Raindrops through a Watercolor Rainbow

Today all I'm doing is using crayon instead of paint for the raindrops in my last post.
Painting Raindrops

Then I'm adding a rainbow over the crayon raindrops.


  • Draw and color in some raindrops with a blue crayon.
  • You only need about 1/4 the size of a blue sheet of construction paper because a few raindrops might be fun whereas a lot of them might be tedious.

Crayon Raindrops on a Small Blue Piece of Construction Paper

  • With watercolor paints, paint a rainbow over the raindrops.
  • Start at the bottom of the rainbow and work up.
7. Red
6. Orange
5. Yellow
4. Green
3. Blue
2. Indigo
1. Violet

Watercolor Rainbow over Crayon Raindrops


Saturday, March 28, 2015

Easter Sunrise: Simple Paper and Watercolor Craft


Part I: The Background Sunrise Sky Colors

Paint Your Sunrise Watercolor

On a sheet of orange construction paper, paint any colors you'd like to be in your sunrise. 
I stuck to mostly red, yellow, orange, purple and violet. 
The streak I tried with dark blue became too dark.

Experiment adding more water to your brush for lighter colors or for blending colors. Then try using a drier brush for more vivid colors by dipping it in water, blotting it on a napkin before dipping it in the paint. 
After your orange paper is filled with colors, start on the sun. 

Part II: The Sun

Half Circle of Sun

Cut out a large half circle from yellow paper.

Sun Rays Cut Out

Fold another sheet of yellow construction paper in half and in half again.
Cut the shape of a long triangle for the rays.
You should have four sun rays.

Three Rays Plus Two Halves

Cut one of the four rays in half.


Tuck Rays Under Half Circle of Sun

Tuck the rays under the sun. You can tuck them in more, making them shorter, or leave them longer. Whatever looks best to you.

After you have all pieces placed where you want, glue them on.

Saturday, December 20, 2014

Reindeer Against the Watercolor Northern Lights Sky

This craft uses a watercolor background I made in a  Simple Craft: Little House in a Watercolor Aurora Borealis which has all the details.

Watercolor Craft: Little Igloo Under the Northern Lights is also a follow up from the Little House but is more similar to the reindeer craft here in that it has only two cut out pieces in the foreground.

Here's the background I chose for the reindeer.

Watercolor northern lights for a background


Then I cut out some snow and sketched a reindeer and cut it out too.
Here's the parts all put together, just glue them all on


Reindeer in the snow for the foreground


I got the idea of this particular reindeer from an old Reader's Digest I had in my cabinet near the Alaska postcards. On page 108 of Dec 2010/Jan 2011 is a picture of reindeer as an introduction to the article "Reindeer Country." I liked the sweet face of the reindeer closest to the camera and tried to sketch it, but the picture cut off part of it's body and I had to use my imagination. So I went on a hunt for children's books with good reindeer pictures.

The best I found is Ted Lewin's The Reindeer People (1994). His illustrations are from his paintings.

I also found a nice picture of "Santa Claus and his reindeer" on page 62 of Culture of the World: Sweden by Delice Gan and Leslie Jermyn (2003).

So if you are up to a free hand sketch, these pictures will give you a good idea of what real reindeer look like.

Back to Ted Lewin's book. I was happy to find his painting of the northern lights with a Lavu, which he explains is a herding tent of the Sami also known as Lapp people. His painting is a much lovelier example of northern lights in watercolor than mine.  :)

Tuesday, December 16, 2014

Watercolor Craft: Little Igloo Under the Northern Lights

Out of my artistic attempts at the aurora borealis from the last craft: Simple Craft: Little House in a Watercolor Aurora Borealis (in which I give much more detail about these aurora borealis crafts), I chose this one:

Watercolor Northern Lights

Then I cut out snow and an igloo, drawing snow bricks on the igloo with a pencil.

Placing the igloo and the snow

Next I put a little clear glue on a paper napkin and applied the glue with a cotton swab to both the snow and the igloo at the same time.

Apply the glue to both pieces at once

I placed the snow on the background first leaving the top edge turned back just a bit, so I could slip the bottom of the igloo under it.

Gluing on snow and igloo

When I had both pieces in the places I wanted, I smoothed the edges over.

Finished Igloo in the Snow Under the Northern Lights


Wednesday, December 10, 2014

Simple Craft: Little House in a Watercolor Aurora Borealis

This little house could belong to one of Santa's elves and so turn into a Christmas craft, or it could simply celebrate such beautiful and unique natural phenomena we have on this earth of ours.

After looking at pictures of the aurora borealis in post cards I have from Alaska put out by Accent Alaska and in Donna Walsh Shepherd's book of Light Shows in the Night Sky Auroras, I attempted similar skies in watercolor.

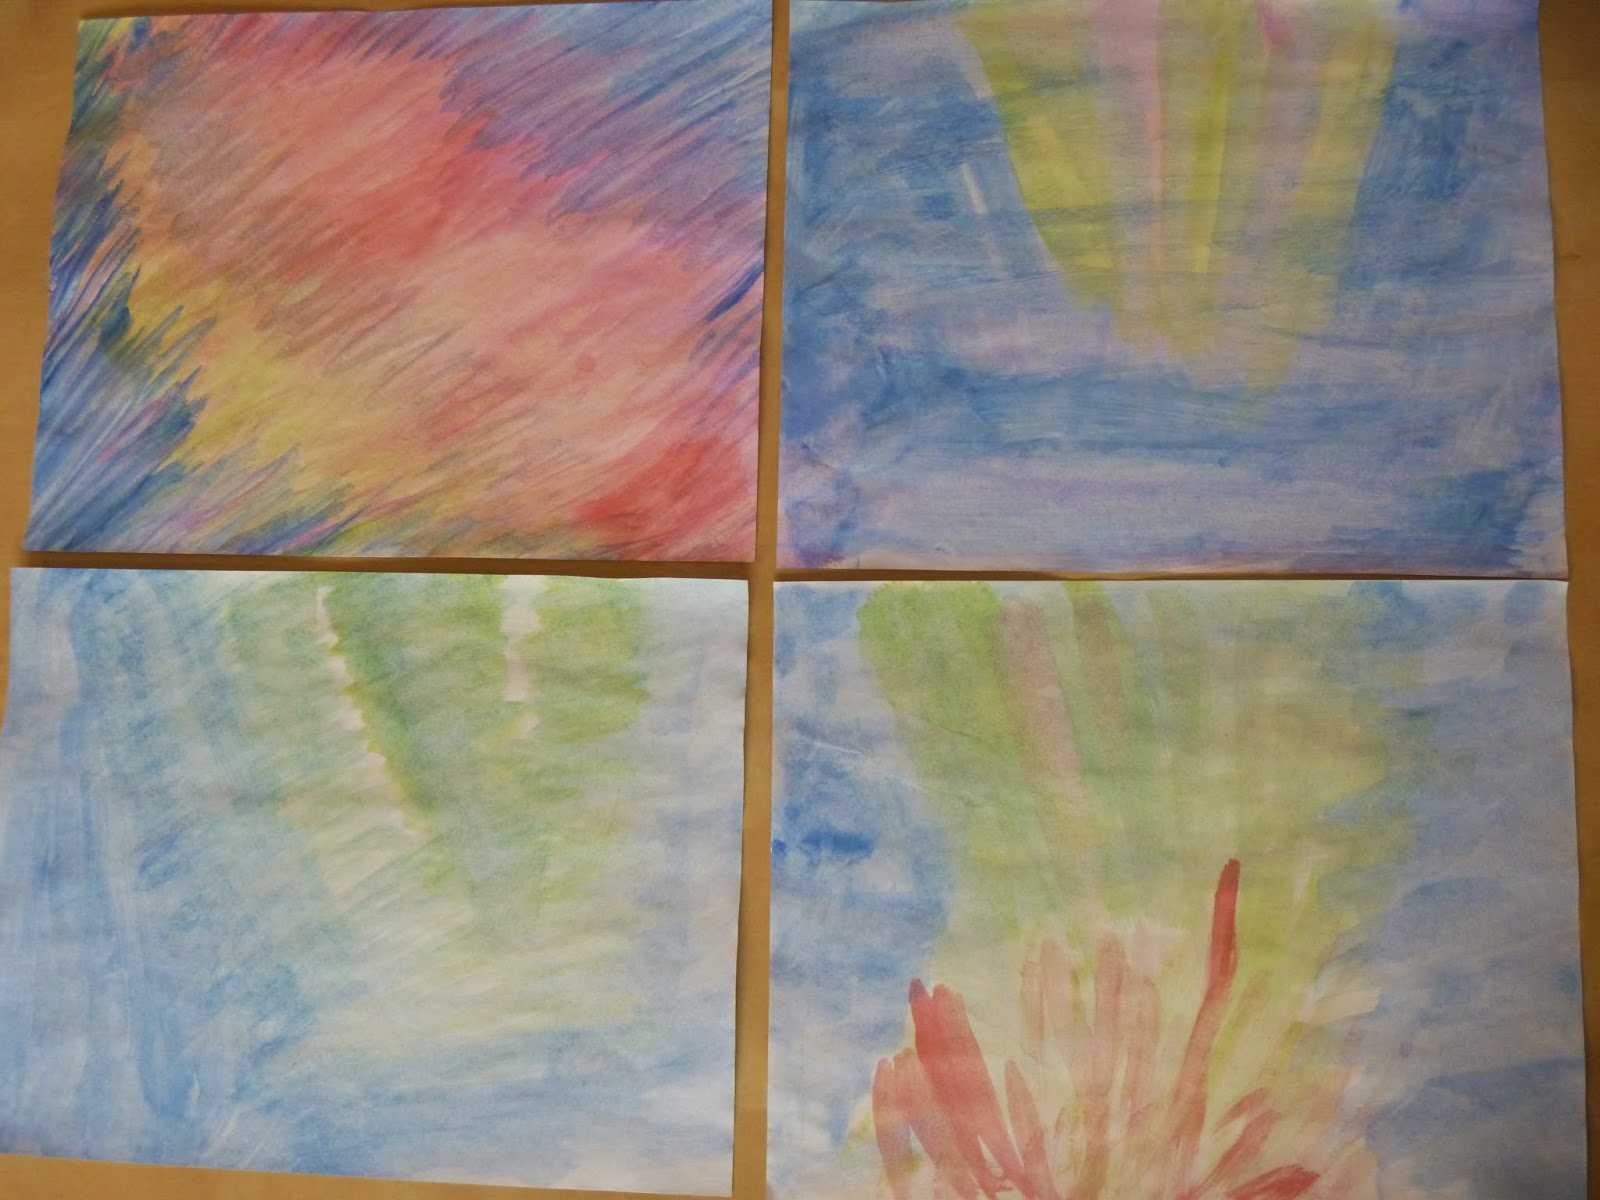
Humble beginnings of four future crafts

Updates of these watercolors: 
The bottom left watercolor became: Watercolor Craft: Little Igloo Under the Northern Lights  (Dec. 16th).
The top left watercolor became: Reindeer Against the Watercolor Northern Lights Sky (Dec. 20th).
The bottom left watercolor became: Snowy Pine Trees Framing the Watercolor Aurora Borealis Sky: Paper Craft (Dec. 27th)


If you check out www.accentalaska.com and search northern lights, you'll find impressive photos of auroras so fabulous you won't want to take second look at my creative interpretations here. I myself felt like throwing them out except that the beauty of watercolor skies is that the foreground can make all the difference and complement the colors as to make attractive what at first may have seemed to have very little potential. Above, again, then is the humble beginnings of what turned out to be future crafts.

Below is the background, not pictured above, I chose for the little house in the aurora borealis craft.

Little House background

Watercolor skies are great crafts for all ages and abilities as it's all in what you do with it, and how you decide to view it.

The northern lights are so varied, that each artist has so much room to let his or her imagination run wild. Donna Walsh Shepherd's little book is rich in essential facts about this phenomenon and it is from her that I learned southern and northern lights can reflect each other. It's a book older children could read themselves. For me it's a quick read with enough detail to accurately help me understand these unique lights.

I love combining learning and crafting.

Now back to the craft.

Materials:

  • 2 sheets of letter size printer paper
  • 1 sheet of red construction paper
  • 1 sheet of brown construction paper
  • 1 sheet of yellow construction paper
  • 1 cotton ball
  • watercolor paints and brush
  • glue
  • scissors
  • and a ruler if you want straight lines ( I don't always use one.)
This is a craft that I like to do a lot of estimating and playing with pieces and placement.

I've put my little house in the snow. Since I used white 8 1/2 x 11 letter size printer paper for the background, it was easy to take another sheet and to cut a wavy line about 2 inches up from the bottom for the snow.

Snow on the ground

It fits nicely along the bottom of the watercolor background.

Just place it --the snow-- on without gluing it yet.

For this craft, I like to cut out all the pieces first before gluing, so I can make adjustments as needed.

After cutting out the snow, I cut a square out of red construction paper about the size I wanted my house.

Red base of house

I tucked the square under the snow--again only placing on the background without gluing--to see if it was the size I wanted.

Next, I placed a piece of brown paper on the top of the red square and marked how large I wanted to make the triangle for the roof. 

Brown triangle roof topping the red square

Then I cut out the door from brown paper and a knob from red paper, and put them both in their place.

Door and knob

Next I chose the windows to be yellow paper to give a warm glow for the inside. I also used a brown marker to add the look of wooden frames into the panes.

Windows with marker frames


Almost finished, I cut a small rectangle out of red construction paper.

Rectangle for the chimney


and tucked it into the top of the roof.

The chimney all tucked in


Last I stretched out a small portion of a cotton ball and tucked it into the top of the chimney for the smoke rising up out of the fire in the fireplace of the cozy little house.

Smoke out of the chimney

After I was happy with the size and placement of all the pieces, I glued them all on , putting a small puddle of glue on a scrap of paper and dipping a cotton swab into the glue to run across the edges of each piece of the picture.

The order I glued the pieces on is the same as the order I used to cut them out: 1. snow, 2. red base of house, 3. triangle of the roof, 4. door and knob, 5 windows, 6. chimney, 7. smoke.


Apply glue with a cotton swab to the back edges of the snow first

Glue on pieces in the same order as they were cut out

Since all the gluing is done at once, it's easy to tuck pieces under one another as long as you leave the edges loose. That is, don't smooth all the edges down after gluing them in place. Wait until all the pieces are exactly where you want them before smoothing all edges over and sealing them down.


Leave the edges loose to easily tuck under other pieces

To  attach the chimney smoke, put the glue on the background instead of the cotton, so the cotton swab doesn't get stuck to the cotton smoke and tear it all apart.


Little House in a Watercolor Aurora Borealis Finished


Monday, April 7, 2014

Easy Watercolor Notepaper and Envelope

Easy Watercolor Envelope and Notepaper


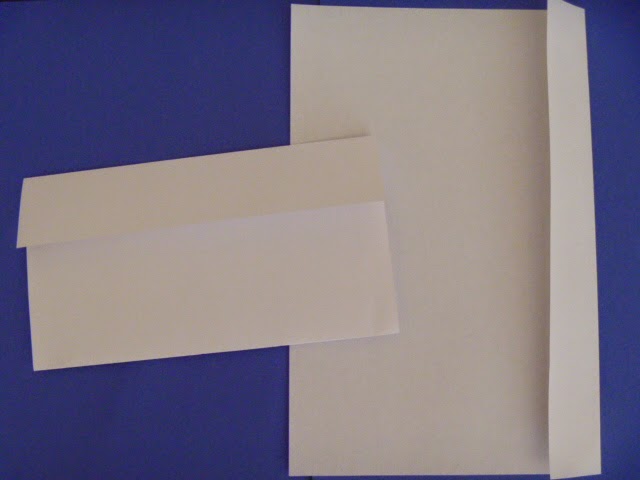
1. Fold an 8 1/2" x 11" sheet of white paper up from the bottom about four and a half inches for the envelope.
2. Fold the flap down about two inches.


3. Using a second sheet of white paper, fold the edge over about one and a half inch.

4. Dampen the crease with a paintbrush dipped in water.


5. Tear off the edge.


6. With crayons, decorate the flap of the envelope and the top of the notepaper.

7. Unfold the envelope making sure the flap decoration is on the top (It should be up-side-down).
  • Put the envelope and notepaper next to each other.


  • 8. Using watercolors, paint  any patterns you'd like on the envelope and notepaper.
  • For light colors, use a very wet paintbrush.
  • For matching envelope and notepaper, make the pattens similar.

Let dry.
~~~~~~~~~~~~~~


9. After the paint is dry, turn the envelope over.

10. Apply glue to the side edges of the bottom of the envelope with a clean damp paintbrush.
  • I used Tacky glue since it isn't runny.
  • Make sure to wash out the paintbrush thoroughly with warm water after applying the glue.

11. Fold up the bottom portion of the envelope with glue on the edges and smooth over the edges to securely glue them together.

12. Fold the notepaper in thirds.
  • Start by folding up the bottom third of the notepaper.


13. Finish folding the notepaper by turning under the bottom portion as if folding a fan.
  • The top decoration should showing.


14. Check that the notepaper fits in the envelope.


~~~~~~~~~~~~~~~
15. After writing a note or drawing pictures on the notepaper, put it in the envelope and seal the envelope with a little glue or a sticker.
  • Deliver this letter by hand because this envelope is too delicate to go through the mail.


Seal the envelope with a dab of glue or a sticker

Friday, April 4, 2014

Watercolor Note Paper and Envelope

Watercolor Envelope and Note Paper
Even though the envelope isn't strong enough to be sent through the snail mail, it's fun to use to enclose your notes to family and friends for birthdays and other occasions.


1. Start the square for the envelope by folding up one corner of an 8 1/2" x 11" white sheet of printer paper.


2. Use the end of a paint brush to smooth over the crease

3. Put a little water along the crease with the paint brush.

4. Tear off the extra piece.

5. Now you have a square for the envelope.

6. Fold over the opposite corner about one forth inch short of the untorn edge.

7. Fold over this one forth inch extra and smooth crease.

8. Apply water to crease.
9. Tear off the thin strip and save it for later.


10. Open the corners to a diamond shape with the torn edges pointing up.

11. Fold the two side corners in to meet in the middle.
12. Fold the bottom corner up about an inch past the middle.

13. Crease the extra inch of corner and dampen the crease. 

14. Tear off the extra corner and save for later.

15. You are almost finished folding the envelope.

16. Bring the top corner down to close.
  • Set the envelope aside while you create two pieces of note paper.


17. Fold a second sheet of white paper in half.


18. Dampen the crease and tear in half.
19. Fold one of the halves in half again and dampen the crease.


20. Tear in half again and you'll have two pieces of note paper one forth the size of the original white sheet.


Ready to Paint


21. Unfold the envelope, turn it over, and set it next to the scraps and two piece of note paper.


22. Using a lot of water so the colors aren't too dark, paint similar designs on the envelope, scraps, and note paper. 


23. Keep a paper towel under your container of water, so you can wipe your brush on it. 
  • The painted paper towel will be used to decorate your note paper.


Let Dry!


24. After the paint is dry, cut two pieces of parchment paper about the size of the note paper.

25. Put one piece of parchment paper inside of the envelope.
  • The parchment paper keeps the glue from sticking the front of the envelope to the back.


26. Apply white glue with a paint brush along the sides and bottom of the envelope. You'll have a guesstimate a little where the glue if needed.

27. After the bottom of the envelope is glued together, use the second piece of parchment paper to tuck under the flap.
  • Now you can decide which closure you'd like. The strip or....


the corner.


28. After you choose your closure, fold the parchment paper up just far enough so you can mark it with a pen to indicate where to glue the closure on.
  • Glue on closure.


29. Cut two shapes of your choice out of the painted paper towel.

30. Glue these shapes on to the top of the note paper.


Note paper should fit in envelope without folding.