Showing posts with label easter. Show all posts

Wednesday, April 2, 2014

An Easter Daisy Craft

Easter Daisy


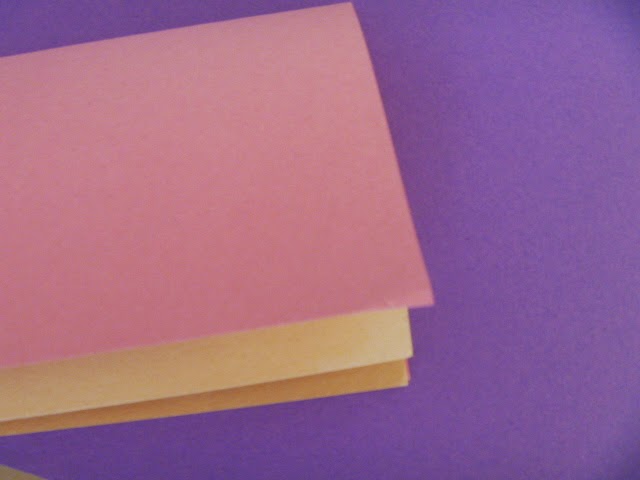
1. Take a sheet of pink and a sheet of cream colored construction paper.
  • Put them together and fold lengthwise.


2. Cut into one inch wide strips.


3. Cut along the fold lines to create four piles of strips each containing four strips.


4. Cut off the corners making each pile into long ovals for the petals of the daisy.


Just arrange the petals on the paper first. Don't glue yet.


5. Make a plus sign in the middle of a sheet of purple construction paper with four of the pink petals.

6. Take two cream color petals and fan them out like a hand of cards.

  • Place the fanned out cream petals over the first pink petal so it peeks out at the top.


7. Fan out the next two cream petals.

  • This time place the cream petals over the second pink petal.


8. Fan out the fifth and sixth cream petals.

  • Place these two over the third pink petal.


9. Fan the seventh and eighth cream petals.

  • Place these over the forth pink petal.


10. Now add the last four pink petals between the cream ones forming a kind of four point pink star.


  • Check out your daisy and adjust any petals you'd like to make them more evenly placed.


~~~~~~~~~~~~~~~~~~~

Now that we can see how the petals fit, we're ready to start gluing them on. 

We'll follow a sightly different order, so we can adjust nearby petals as needed before the glue dries.


11. Glue on the pink plus sign.


12. Glue on the first two fanned cream petals.

13. Glue on the second two fanned cream petals.


Here the order changes.
14.  Glue on the first pink petal of the star and then adjust (if needed) the cream petals before the glue dries.


15. Glue on the fifth and sixth cream petals.

16. Glue on the second pink petal of the star, and adjust the cream petals if needed.

17. Glue on the seventh and eighth cream petals.

18. Glue on the third pink petal of the star and adjust the cream petals if needed.

19. Glue on the last pink petal of the star and adjust other petals as needed if the glue hasn't dried yet.


Now a 2" x 2" square--or diamond


Monday, April 4, 2011

Easter basket drawing with rectangles, and circles or ovals

When kids discover how easy it is to create drawings with shapes, they may start inventing their own designs. Here's a kid designed drawing of an Easter basket complete with directions starting with a rectangle, and ending with a simple basket filled with eggs.

Thursday, April 1, 2010

Recycled Paper Easter Egg Basket


Here's a tedious but rewarding little craft. This Easter egg basket was made from leftover wrapping paper and scotch tape, so it is not sturdy enough to hold real eggs. It's great for paper eggs in a bed of shredded paper though.

Older tweens who like crafting, and are patient may find this basket both challenging and rewarding to get to the finished product. Especially if made for an eagerly waiting younger brother, sister, or cousin.

The basket here was made by first cutting 8 strips of paper about 1/2 inch wide, and a foot long. Weave these together at the middle to form the bottom of the basket. Put little pieces of tape as needed to hold it together. Long ends of the strips should be ready for weaving the sides up.

Use another strip of paper of similar size to start the sides of the basket. Weave the strip one full circle around the bottom. Then tape the meeting ends together to secure, and clip off the remainder. Continue on in this manner until the sides are as high as you'd like.

At this point remaining strips from the original 8 strips will be hanging over the edges. Fold each over to end each weave, cut off extra, and tape.

Use two strips of the same size as the rest twisted together to form the handle. Attach with tape.

Happy Easter!

Tuesday, March 30, 2010

Egg tracing


Sometimes the simplest things create great ideas. Just cutting a few egg shapes of different sizes out of an old cereal box, so they can be traced, may instigate a crafting time.

Cutting out other shapes to trace such as a diamond which can be traced again and again until a pattern is made across a picture of an egg, can inspire other ideas for egg decorations as well.

All that's needed is thin cardboard like an old cereal box, paper, pencil, and non-toxic pens or crayons.

Paper Mache Easter Egg


Here's a goopy little craft. It's about the size of a real egg, and made with two rolled up balls of newspaper secured with masking tape, ripped up junk mail, and glue. Glitter is optional.

Just use 1/2 of a newspaper page for the first ball, and the other half for the second ball. Make the second a little tighter and smaller. Then wrap with masking tape to hold the two balls together in an egg shape.

Use little torn pieces of brightly colored junk mail. We used a clothes catalog. The smaller the pieces, the easier they secure to the egg.

Put the egg on a plastic lid, so it doesn't stick during the paper macheing process. On another plastic lid, put about a quarter size of white, non-toxic glue like Elmer's. Use about the same amount of water, and mix together.

Dip the pieces of torn paper through the glue mixture, and lay them across the newspaper egg until it is covered with colored paper. A little glitter could be added. It could even be painted after it is dry with non-toxic poster paints. The decorations begin with your imagination like attaching beads or dry beans and different shaped dry pasta.

The sticky fun is in the doing it together. As can be seen from the picture, it doesn't have to be perfect.